
Fixing an iPad Stuck in Recovery Mode is straightforward, even if you’re new to tech troubleshooting. You can usually resolve this by using Finder or iTunes to update or restore your iPad. We’ll guide you through the steps to get your device working perfectly again.
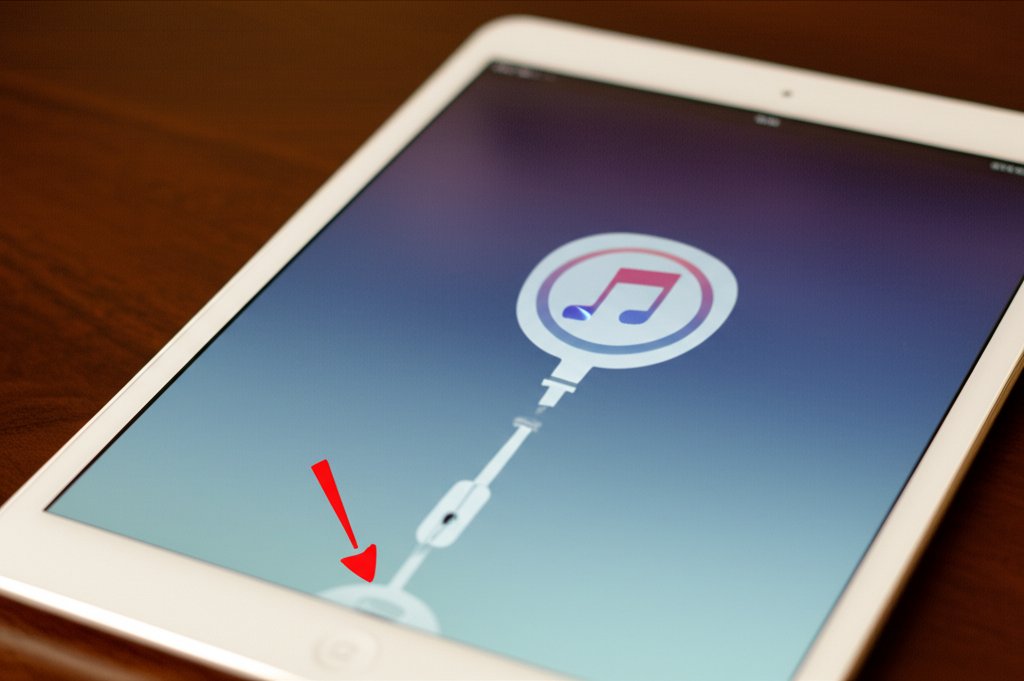
Oh no! Your iPad is showing that familiar, slightly terrifying recovery mode screen – the one with the cable pointing to a computer icon. It can feel like your iPad has gone on strike, and you’re not alone in experiencing this.
This can happen for many reasons, from a software glitch to an update that didn’t quite finish. It’s a common hurdle, but don’t worry! Getting your iPad out of this mode is usually a simple process, and you don’t need to be a tech wizard to sort it out.
This guide is here to walk you through, step-by-step, with friendly advice to help you ease your iPad back into action. We’ll cover everything you need to know to overcome this challenge with confidence.
Why Is My iPad Stuck in Recovery Mode?
Seeing your iPad stuck in recovery mode can be puzzling. It’s a safety feature designed by Apple to help when something goes wrong with the iPadOS software. When your iPad enters this mode, it means it can’t start up normally.
Several things can trigger this. Sometimes, a software update might have been interrupted, or a new app could have caused a conflict. Even a system file getting corrupted can lead your iPad to believe it needs a fresh start. Think of it as your iPad’s way of saying, “I need a little help to get back on track!”
Understanding Recovery Mode
Recovery mode is essentially a special startup state for your iPad. It’s a basic, functional environment that allows your device to communicate with a computer running iTunes or Finder. When your iPad is in this mode, it’s accessible for specific troubleshooting actions that wouldn’t be possible if it were trying to boot up normally.
The screen you see, typically a picture of a cable and a computer, is a visual cue. It’s telling you, “Connect me to a computer!” This connection is crucial for the next steps in getting your iPad operational again. It’s a clear signal that your iPad is ready for an update or restore.
When to Use Recovery Mode vs. DFU Mode
It’s helpful to know that there’s more than one special mode. Recovery mode is the most common one you’ll encounter when troubleshooting software issues. It’s designed for updates and restores, and it generally preserves your data if you choose to update.
DFU (Device Firmware Update) mode is a deeper level of connection. It allows your device to communicate directly with Apple’s servers without loading any firmware or bootloader. This is typically used for more severe issues when a standard recovery mode fix doesn’t work. For most “stuck” situations, recovery mode is the first and most appropriate step.
What You’ll Need
Before diving into the fix, let’s gather what you’ll need. Having everything ready will make the process smoother and less frustrating for you.
- Your iPad that’s stuck in recovery mode.
- A USB cable that’s compatible with your iPad and your computer. This should be the cable you usually use for charging or connecting your iPad.
- A computer (either a Mac or a Windows PC).
- The latest version of iTunes installed on your Windows PC, or Finder on a Mac running macOS Catalina or later.
- A stable internet connection.
Solution 1: Update Your iPad Using Finder or iTunes
This is often the most effective and simplest way to get your iPad out of recovery mode. The “Update” option attempts to reinstall iPadOS without erasing your personal data. It’s like giving your iPad a software tune-up.
If your iPad is stuck, it means it can’t boot up normally. Trying to update it allows the computer to push the operating system files to your device, hopefully fixing the issue that caused it to get stuck in the first place. This is usually the preferred method because it aims to keep your apps and settings intact.
Step-by-Step: Updating Your iPad
Let’s walk through the precise steps to update your iPad. Take your time and follow each instruction carefully.
- Connect Your iPad to Your Computer: Use your USB cable to connect your iPad to your Mac or Windows PC.
- Open Finder or iTunes:
- On a Mac (macOS Catalina or later): Open Finder. Your iPad should appear in the sidebar under “Locations.”
- On a Windows PC or a Mac (macOS Mojave or earlier): Open iTunes. Make sure you have the latest version installed. Your iPad should appear as a small device icon near the top-left corner.
- Locate Your iPad in Finder or iTunes: Click on your iPad’s icon when it appears. You should see a summary screen for your iPad.
- Choose the “Update” Option: You’ll see options to “Restore” or “Update.” Click on “Update.”
- Confirm Update: Your computer will ask if you want to update your iPad. Confirm by clicking “Update.” If prompted, you might need to enter your computer’s password.
- Wait for the Update to Complete: Your computer will download the latest iPadOS software and then begin the update process on your iPad. Do not disconnect your iPad during this process. It might restart a few times.
- Setup Your iPad: Once the update is finished, your iPad will restart. It should then boot up normally, and you can set it up as usual, though you’ll want to ensure all your apps and data are there.
This process can take some time, depending on your internet speed and the size of the iPadOS update. Patience is key here!
Solution 2: Restore Your iPad Using Finder or iTunes
If the “Update” option doesn’t work or your iPad is still stuck, the next step is to “Restore.” Restoring your iPad will erase all content and settings and install the latest version of iPadOS. This is a more drastic step, but it’s very effective for resolving deep software issues.
Think of restoring as giving your iPad a completely fresh start. It’s like getting a brand-new device, but with the latest software. This is why it’s vital to have a backup if you haven’t already synced with iCloud or your computer, as all your personal data will be erased.
Step-by-Step: Restoring Your iPad
Follow these steps carefully if you need to restore your iPad. Remember, this will erase everything.
- Connect Your iPad to Your Computer: Connect your iPad to your Mac or Windows PC using your USB cable.
- Open Finder or iTunes:
- On a Mac (macOS Catalina or later): Open Finder. Select your iPad from the sidebar under “Locations.”
- On a Windows PC or a Mac (macOS Mojave or earlier): Open iTunes. Click the small device icon near the top-left corner.
- Locate Your iPad in Finder or iTunes: Click on your iPad’s icon to view its summary.
- Choose the “Restore” Option: You will see both “Update” and “Restore” buttons. Click “Restore.”
- Confirm Restoration: A warning will appear stating that restoring will erase all your data and settings. Click “Restore” again to confirm.
- Wait for Restoration: Your computer will download the latest iPadOS software, erase your iPad, and then install the new software. This process can take a while. Do not disconnect your iPad.
- Set Up Your iPad: Once the restore is complete, your iPad will restart. You’ll then see the “Hello” screen, as if it were brand new. You can then set it up from scratch or restore from a recent backup if you have one.
If you have a recent iCloud or computer backup, you can select the option to restore from that backup during the setup process. This will bring back your apps, settings, and data.
What If My iPad Doesn’t Appear in Finder or iTunes?
Sometimes, even when your iPad is in recovery mode, your computer might not recognize it. This can be a bit frustrating, but there are a few things to check. First, ensure you’re using a genuine Apple USB cable or a certified MFi (Made for iPhone) cable, as some third-party cables might not work for this type of connection.
Try a different USB port on your computer. Sometimes, a specific port can be faulty. You might also need to restart your computer. If you’re using a Windows PC, check that the Apple Mobile Device USB Driver is installed and working correctly. You can usually find this in Device Manager under “Universal Serial Bus controllers.”
What If My iPad Still Doesn’t Work After Restoring?
If you’ve gone through the restore process and your iPad is still stuck in recovery mode, or if it continues to misbehave after restarting, it might indicate a more serious hardware issue or a persistent software problem that standard methods can’t fix. In such cases, it’s probably time to seek professional help.
The next best step is to contact Apple Support directly. They have advanced diagnostic tools and can offer further assistance. You can also visit an Apple Store or an authorized Apple service provider for a hands-on assessment of your device.
About iCloud and iTunes Backups
Before you even think about restoring your iPad, let’s chat about backups. Think of a backup as a digital snapshot of your iPad. It saves your photos, videos, contacts, app data, and settings. This is super important because restoring your iPad will wipe everything clean.
Apple offers two main ways to back up: iCloud and your computer (using iTunes or Finder). iCloud backups happen wirelessly when your iPad is connected to Wi-Fi, locked, and charging. Computer backups are done when you connect your iPad to your Mac or PC. Having a recent backup means you can quickly get your iPad back to how it was before the problem occurred, without losing precious memories or important information.
iCloud Backup Details
iCloud is incredibly convenient. It backs up your device automatically whenever you meet its conditions. This means you’re often backed up without even doing anything special!
- How it works: Your iPad backs up to Apple’s cloud servers.
- Requirements: Wi-Fi connection, at least 5GB of free iCloud storage (you can purchase more), your iPad plugged into power, and locked.
- What’s included: App data, device settings, home screen layout, iMessages, text messages, photos, videos, purchase history from Apple services.
- What’s not included: Data already stored in iCloud (like iCloud Photos, Contacts, Calendars), Apple Mail data, information stored in other cloud services, Apple Pay information, Face ID or Touch ID settings.
You can check your last iCloud backup date by going to Settings > [Your Name] > iCloud > iCloud Backup. If it’s recent, you’re in a great position to restore from it after fixing your recovery mode issue.
iTunes/Finder Backup Details
Backing up to your computer is a solid option, especially if you have a lot of data or limited iCloud storage. This creates a local copy on your Mac or PC.
| Feature | Finder (Mac) / iTunes (Windows) Backup |
|---|---|
| Backup Location | Your computer’s hard drive |
| Speed | Often faster than iCloud, depending on your connection and cable |
| Storage | Limited by your computer’s available space |
| Encryption | Option to encrypt backup, which saves passwords and Wi-Fi settings |
| Setup Process | Connect iPad and initiate backup manually or set to sync automatically |
If you choose to encrypt your computer backup, make sure to remember the password you set! Losing that password can make the backup inaccessible, similarly to losing the key to a secure vault containing your digital treasures.
When to Consider Professional Help
While many iPad issues can be resolved with simple steps, sometimes it’s clear that you need a helping hand. If you’ve tried updating and restoring, and your iPad still refuses to cooperate, or if it’s showing signs of physical damage like a cracked screen or water damage, it’s time to call in the experts.
Apple Support is your first point of contact for official guidance. They can troubleshoot remotely or guide you on the best next steps, which might involve a hardware assessment. For more complex diagnosis or repair, authorized Apple service providers are also excellent resources. They have the tools and expertise to handle issues that go beyond software.
Don’t hesitate to reach out to them. It’s better to get professional advice than to risk further damage or spend hours trying solutions that might not work.
Frequently Asked Questions (FAQ)
Q1: How do I get my iPad out of recovery mode without losing data?
A1: The best way to try and exit recovery mode without losing data is by using the “Update” option in Finder (on Mac) or iTunes (on Windows). This attempts to reinstall iPadOS while keeping your personal information intact.
Q2: How long does it take to update or restore an iPad?
A2: The time varies greatly depending on your internet connection speed and the size of the iPadOS software. Updates can take anywhere from 15 minutes to an hour or more. Restoring your iPad might take a similar amount of time or potentially longer since it involves erasing and then installing the system.
Q3: Can I use any USB cable to connect my iPad to the computer?
A3: It’s best to use the original Apple USB cable that came with your iPad or a certified MFi (Made for iPhone) cable. Some third-party or uncertified cables might not support the data transfer needed for recovery mode operations.
Q4: What’s the difference between “Update” and “Restore” in Finder/iTunes?
A4: “Update” attempts to reinstall iPadOS while preserving your data, apps, and settings. “Restore” erases everything on your iPad, installs the latest iPadOS, and essentially returns it to factory settings. You’d typically choose “Update” first, and if that doesn’t work, then “Restore.”
Q5: My computer still doesn’t recognize my iPad in recovery mode. What should I do?
A5: Try a different USB port, restart your computer, and ensure you’re using a reliable USB cable. On Windows PCs, you might need to check for and update the Apple Mobile Device USB Driver in Device Manager.
Q6: Will restoring my iPad delete everything?
A6: Yes, the “Restore” function will erase all content, settings, and data from your iPad. This is why it’s crucial to have a recent backup if possible. You will be prompted to set up your iPad afterward and can choose to restore from a backup then.
Q7: What if the update/restore process fails midway?
A7: If an update or restore fails, unplug your iPad, restart both your iPad (by holding the power and home button until the Apple logo appears, or button combinations for newer iPads) and your computer, then reconnect and try the process again. If it fails repeatedly, your iPad might have a more significant issue requiring professional support.
Conclusion
Experiencing your iPad stuck in recovery mode can be a bit of a hiccup, but as you’ve seen, it’s a solvable one. With a little patience and by following these straightforward steps, whether it’s updating or restoring your device through Finder or iTunes, you can typically bring your iPad back to its fully functioning glory.
Remember, the “Update” option is your first go-to, aiming to save your precious data. If that doesn’t do the trick, “Restore” is a powerful tool for a fresh start, especially if you have a recent backup. Keeping your iPadOS software up-to-date in general can help prevent these situations from arising. And if all else fails, don’t hesitate to reach out to Apple Support for that extra bit of help.
You’ve got this! Navigating these tech moments can even be a little empowering, turning a potentially frustrating issue into a learning experience. Your iPad is likely just a few steps away from being back in your hands, ready for all your tasks and adventures.