
Quick Summary:
If your iPad camera isn’t working, try these quick fixes: force restart your iPad, check app permissions, ensure the camera lens is clean, and update your iPadOS. These simple steps often resolve common camera issues without needing expert help.
It’s super frustrating when your iPad camera suddenly stops working, right? You want to snap a quick pic, jump on a video call, or scan a document, and BAM! A black screen or an error message is all you get. Don’t worry, this happens more often than you think, and usually, there’s a simple fix you can do yourself!
We’ll walk through some easy steps to get your iPad camera back in action. No complicated tech talk, just straightforward solutions to help you capture those precious moments again.
Let’s dive in and see how we can get your camera rolling!
Why is My iPad Camera Not Working? Common Reasons
There are a few common culprits behind a stubbornly black iPad camera screen or an app that refuses to display anything. Sometimes, it’s a simple software glitch, other times it might be an app misbehaving or even just a dusty lens.
Understanding these common reasons can often point you towards the right fix without too much guesswork. Think of it like diagnosing a simple cold – a runny nose might be allergies, a bug, or just the weather!
Software Glitches and App Conflicts
The most frequent reason your iPad camera might act up is a temporary software hiccup. Your iPad’s operating system (iPadOS) is complex, and just like any computer, it can sometimes get a little confused. This can happen after an update, when too many apps are running, or just randomly.
Apps also play a role. If an app that uses the camera, like FaceTime or Instagram, isn’t behaving correctly, it can prevent the camera from working altogether, even in other apps. It’s like one rowdy friend at a party causing trouble for everyone else.
Camera Permissions Issues
Your iPad smartly protects your privacy by requiring apps to ask for permission before they can access things like your camera or microphone. Sometimes, these permissions can get accidentally turned off, or an app might have lost its access, especially after an iPadOS update.
Without the right permissions, an app simply won’t be allowed to “see” through the camera, leading to a blank screen within that specific application. We’ll cover how to check and fix these permissions later.
Hardware Problems (Less Common)
While less common, it’s possible that there’s a physical issue with your iPad’s camera. This could be due to accidental damage, like dropping your iPad, or a defect from the factory. These issues are rarer, and usually require professional attention from Apple or an authorized repair shop.
However, before you jump to conclusions about hardware, it’s always best to try the software fixes first. They are much easier and quicker to resolve!
Troubleshooting Steps: How to Fix iPad Camera Not Working
Let’s get to the good stuff! Here are the most effective and beginner-friendly ways to fix your iPad camera when it’s not working. We’ll start with the simplest solutions and move towards slightly more involved ones.
Remember, patience is key. Go through these steps one by one, and test your camera after each. You might be surprised how often a simple action does the trick!
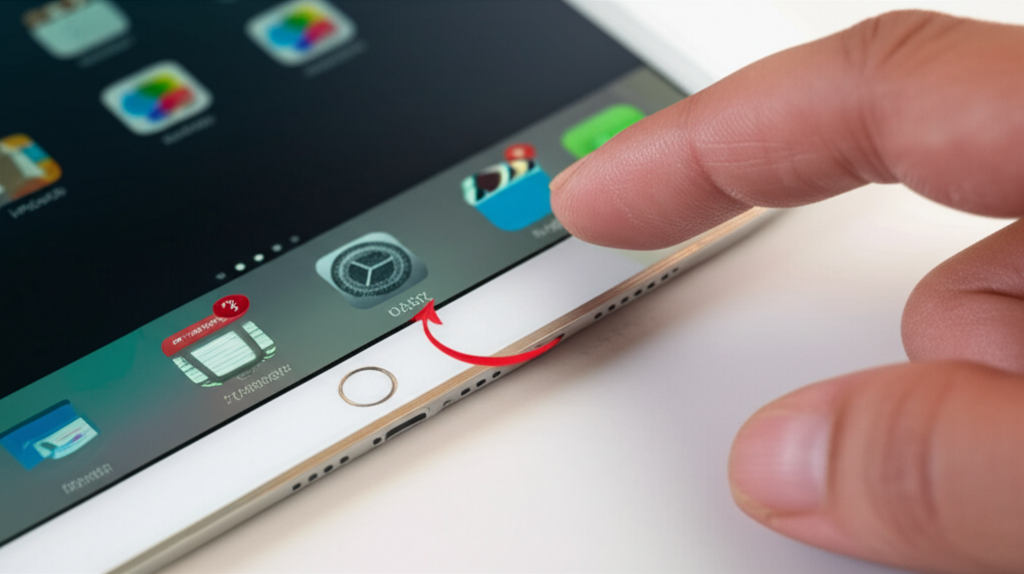
1. Force Restart Your iPad
This is the digital equivalent of a power nap for your iPad. A force restart clears out temporary memory and can resolve many minor software glitches that might be preventing your camera from working. It’s much more effective than a regular restart.
How you do it depends on your iPad model. Don’t worry, it’s straightforward!
For iPads Without a Home Button (Most newer models):
These models include iPads with Face ID, like the iPad Pro (2018 onwards), iPad Air (4th gen onwards), iPad mini (6th gen), and standard iPad (8th gen onwards).
- Press and quickly release the Volume Up button.
- Press and quickly release the Volume Down button.
- Press and hold the Top button (the power button) until you see the Apple logo appear on the screen.
For iPads With a Home Button (Older models):
This includes older iPads, iPad Air models before the 4th gen, and iPad mini models before the 6th gen.
- Press and hold both the Home button and the Top button (power button) simultaneously.
- Continue holding them until you see the Apple logo appear on the screen.
Once your iPad restarts, open the Camera app and see if it works. If not, let’s try the next step!
2. Close and Reopen the Camera App
Sometimes, the camera app itself might be frozen or stuck. Simply closing it completely and then reopening it can reset it and resolve the issue. This is a quick and easy step that can often work wonders.
Here’s how to properly close an app on your iPad:
- For iPads without a Home button: Swipe up from the bottom of the screen to reveal the App Switcher. Swipe through the app cards at the top until you find the Camera app. Swipe the Camera app card upward to close it.
- For iPads with a Home button: Double-press the Home button to bring up the App Switcher. Swipe through the app cards at the bottom until you find the Camera app. Swipe the Camera app card upward to close it.
After closing the app, tap the Camera icon on your Home Screen to open it again and check if the camera is working.
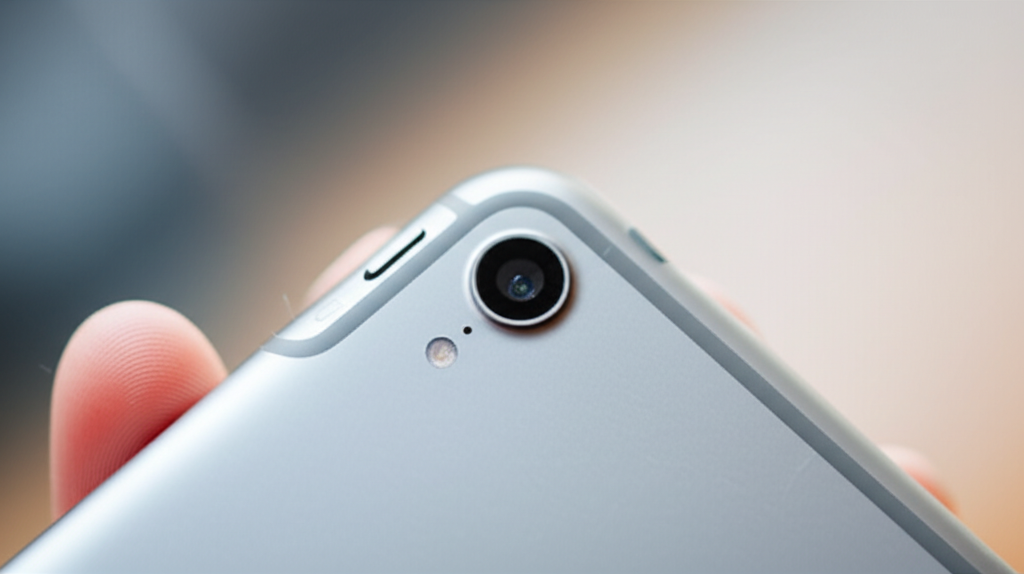
3. Clean the Camera Lens
This might sound embarrassingly simple, but you’d be surprised how often a smudged or dirty camera lens is the reason for blurry photos or a persistently black screen. Fingerprints, dust, and even pocket lint can interfere with the lens.
Look at your iPad’s camera lens(es) closely. Are they clear? If not, grab a soft, lint-free cloth (like a microfiber cloth used for cleaning glasses or screens) and gently wipe the lens. Avoid using abrasive materials or harsh chemicals, as these can scratch or damage the lens.
Once cleaned, try opening the Camera app again.
4. Ensure No Case or Screen Protector is Blocking the Lens
Similar to a dirty lens, a poorly designed or misaligned case or screen protector can also physically obstruct the camera. Some cases have small cutouts that might not line up perfectly, or a screen protector might have adhesive residue near the camera area causing issues.
Temporarily remove your iPad’s case and any screen protector just to test the camera. If the camera starts working without them, you’ll know your accessory is the problem. You may need to adjust the accessory or consider a different one.
5. Verify Camera Permissions for Apps
As we mentioned earlier, apps need permission to use your camera. If the Camera app itself is showing a black screen, this step might not be directly for the built-in Camera app, but it’s crucial for third-party apps like Instagram, WhatsApp, or Skype.
Here’s how to check and grant camera permissions:
- Open the Settings app on your iPad.
- Scroll down and tap on Privacy & Security.
- Tap on Camera. You’ll see a list of apps that have requested camera access.
- Toggle the switch ON (it will turn green) for any app that you want to be able to use your camera.
If the issue is with the built-in Camera app and it’s showing a black screen, this specific permission check might not be the direct solution, but ensure that the “Camera” itself has permissions enabled if it appears in a list (though typically it won’t, as it’s the system app). More importantly, if the Camera app is indeed black, the problem is likely deeper than just app permissions for the Camera app itself. However, this step is vital for any other app you want to use with your camera.
6. Try Switching Between Front and Rear Cameras
Sometimes, only one of the cameras might be having an issue. The iPhone and iPad Camera app makes it easy to switch between the front-facing (selfie) camera and the rear-facing (main) camera. If one isn’t working, the other might be.
Open the Camera app. You should see an icon with rotating arrows, usually in the corner of the screen. Tap this icon to switch between cameras. If one camera shows an image and the other remains black, you might have identified which camera is malfunctioning.
7. Update to the Latest iPadOS Version
Software bugs are often fixed in subsequent updates. If there’s a known issue with the camera in your current version of iPadOS, updating to the latest version can resolve it. Apple regularly releases updates to improve performance, fix bugs, and enhance security.
To check for and install updates:
- Connect your iPad to a Wi-Fi network and ensure it’s charged or plugged into power.
- Go to Settings.
- Tap on General.
- Tap on Software Update.
If an update is available, tap “Download and Install” and follow the on-screen instructions. This process can take some time, so make sure you have a stable Wi-Fi connection and enough battery.
You can find more information on updating your iPad on the official Apple Support website.
8. Reset All Settings
If the above steps haven’t worked, resetting all your iPad’s settings can sometimes clear out deeper software complications without deleting your personal data. This will reset your Wi-Fi passwords, Bluetooth pairings, wallpaper, and other system preferences to their defaults.
Here’s how to do it:
- Open the Settings app.
- Tap on General.
- Scroll down to the bottom and tap on Transfer or Reset iPad.
- Tap on Reset.
- Select Reset All Settings.
- You may need to enter your passcode.
Your iPad will restart. After it boots up, try using the Camera app again.
9. Check for Physical Damage
While we’ve focused on software, it’s important at this stage to consider the possibility of physical damage. If your iPad has been dropped, exposed to moisture, or subjected to significant impact, the camera module itself could be damaged internally.
Carefully inspect the camera area for any visible cracks on the lens or body of the iPad. If you suspect physical damage, especially after a drop or water exposure, proceed to the next step.
10. Contact Apple Support or Visit an Apple Store
If you’ve gone through all the troubleshooting steps and your iPad camera is still not working, it’s highly likely that there’s a hardware issue that requires professional attention. Apple’s support team is excellent at diagnosing and fixing these problems.
You can:
- Visit the official Apple Support website to chat with an advisor or schedule a call.
- Use the Apple Support app on another Apple device if you have one.
- Schedule an appointment at your nearest Apple Store or Apple Authorized Service Provider.
Be prepared to explain the troubleshooting steps you’ve already taken. This will help the Apple technician diagnose the problem more quickly.
iPad Models and Their Camera Capabilities
It’s helpful to remember that different iPad models come with varying camera specifications. While the troubleshooting steps are generally the same, understanding your iPad’s camera capabilities can be reassuring.
For example, newer iPad Pros boast impressive multi-lens systems and LiDAR scanners for advanced photography and augmented reality experiences. Older models might have simpler, but still functional, camera setups. No matter the model, the goal is to get it working!
Here’s a quick look at camera features that can differ:
| iPad Model | Rear Camera Capabilities | Front Camera Capabilities | Notable Features |
|---|---|---|---|
| iPad Pro (11-inch, 3rd gen & 12.9-inch, 5th gen) | 12MP Wide, 10MP Ultra Wide | 12MP Ultra Wide (Center Stage) | LiDAR Scanner, Cinematic mode, Photographic Styles |
| iPad Air (5th gen) | 12MP Wide | 12MP Ultra Wide (Center Stage) | Center Stage |
| iPad mini (6th gen) | 12MP Wide | 12MP Ultra Wide (Center Stage) | Center Stage |
| Standard iPad (9th gen) | 8MP Wide | 12MP Ultra Wide (Center Stage) | Center Stage |
| Standard iPad (10th gen) | 12MP Wide | 12MP Ultra Wide (Center Stage) | Center Stage, Landscape front camera |
| Older Models (e.g., iPad Air 2, iPad mini 4) | 8MP Wide | 1.2MP FaceTime HD | Basic photo and video |
Even with the most basic iPad camera, the troubleshooting steps remain the same to get it functioning correctly. The troubleshooting process is designed to address common software issues that affect all models.
Frequently Asked Questions (FAQ)
How Do I Fix a Black Camera Screen on iPad?
Start by force restarting your iPad. Then, close and reopen the Camera app. Make sure the lens is clean and not blocked by a case. If these don’t work, try updating iPadOS or resetting all settings. If the issue persists, it might be a hardware problem requiring professional repair.
Is it an App Problem or an iPad Problem if My Camera Isn’t Working?
If only one specific app shows a black screen or error, it’s likely an app problem. Try closing and restarting that app, or check its camera permissions in Settings. If the camera is black in the built-in Camera app and other apps, it points more towards a system-wide software glitch or a hardware issue with your iPad.
What Does “Reset All Settings” Do to My iPad?
Resetting all settings on your iPad will return system settings like Wi-Fi passwords, Bluetooth pairings, wallpaper, screen time configurations, and privacy settings back to their factory defaults. It does NOT delete your apps, photos, videos, or other personal data. It’s a useful step to fix software issues without data loss.
Can Water Damage Affect My iPad Camera?
Yes, water or liquid damage can severely impact your iPad’s internal components, including the camera module. If your iPad has been exposed to liquid, even if it seems to be working, internal corrosion can cause problems later. If you suspect water damage and your camera isn’t working, it’s best to avoid further use and contact Apple Support.
How Often Should I Update iPadOS?
It’s generally recommended to update your iPadOS whenever a new stable version is released. Apple releases updates periodically to improve security, fix bugs, enhance features, and sometimes even boost performance. Keeping your iPad updated ensures it runs smoothly and securely. You can check for updates via Settings > General > Software Update.
My iPad Camera Quality is Poor, What Can I Do?
Poor camera quality can be due to a few things. First, ensure the lens is perfectly clean. Second, check if you’re trying to take photos in low light conditions, which can naturally reduce quality. If the quality is consistently bad (blurry, distorted colors), it could indicate software issues (try updating iPadOS or resetting settings) or potential hardware degradation.
Conclusion
Experiencing an iPad camera that won’t work can be a real head-scratcher, but as you’ve seen, most issues are fixable with a few simple, guided steps. From a quick force restart that clears out pesky glitches to ensuring your lenses are crystal clean and your software is up-to-date, these solutions are designed to be straightforward and effective for any beginner.
Remember, technology can be a bit quirky sometimes, but you’ve just armed yourself with the knowledge to tackle common camera problems head-on. You’ve learned how to nudge your iPad back into working order without feeling overwhelmed by tech jargon.
If, after trying all these solutions, your camera still remains stubbornly blank or blurry, don’t hesitate to reach out to Apple Support. Sometimes, a deeper hardware issue requires a bit of expert care, and they are there to help. But for most everyday camera woes, a bit of troubleshooting patience is all you need. Happy snapping, and keep creating those amazing memories!